Heat Press: Difference between revisions
Hippiegunnut (talk | contribs) |
No edit summary |
||
| (3 intermediate revisions by one other user not shown) | |||
| Line 4: | Line 4: | ||
It is ''not'' used for food or reflow soldering. | It is ''not'' used for food or reflow soldering. | ||
The Heat Press has a teflon coated element (so you don't need to use | The Heat Press has a teflon coated element (so you don't need to use an extra teflon sheet on top of the t-shirt) and features auto release. | ||
It will not lock shut when cold. The power switch is to the right of the control panel. It will take several minutes to warm up from cold. | It will not lock shut when cold. The power switch is to the right of the control panel. It will take several minutes to warm up from cold. | ||
| Line 12: | Line 12: | ||
The control panel features two readouts. Normally the top one displays the current temperature and the bottom one displays the target temperature. | The control panel features two readouts. Normally the top one displays the current temperature and the bottom one displays the target temperature. | ||
==Setting | ==Setting Heat and Time== | ||
Press the 'set' button once. | Press the 'set' button once. | ||
| Line 27: | Line 27: | ||
Press 'set' button again when the correct time is displayed to return to normal mode with current temperature on top display and target temp on bottom display. | Press 'set' button again when the correct time is displayed to return to normal mode with current temperature on top display and target temp on bottom display. | ||
When the press | When the press has warmed up, put your t-shirt on the silicone mat. Pull down the handle. The timer will automatically start and will count down on the lower display. When the counter reaches zero the press will automatically release. | ||
==Adjusting Pressure== | ==Adjusting Pressure== | ||
| Line 36: | Line 36: | ||
[[File:HeatPressAnnotate.png|500px]] | [[File:HeatPressAnnotate.png|500px]] | ||
[[Category:Tools_and_Equipment]] | |||
Latest revision as of 13:42, 3 August 2016
About
The Heat Press is used for fixing garment vinyl to t-shirts or similar cotton fabric or for heat setting fabric paints such as airbrush acrylics.
It is not used for food or reflow soldering.
The Heat Press has a teflon coated element (so you don't need to use an extra teflon sheet on top of the t-shirt) and features auto release.
It will not lock shut when cold. The power switch is to the right of the control panel. It will take several minutes to warm up from cold.
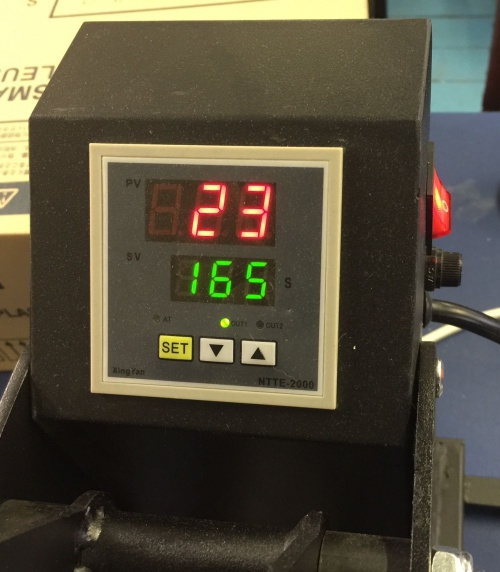
The control panel features two readouts. Normally the top one displays the current temperature and the bottom one displays the target temperature.
Setting Heat and Time
Press the 'set' button once.
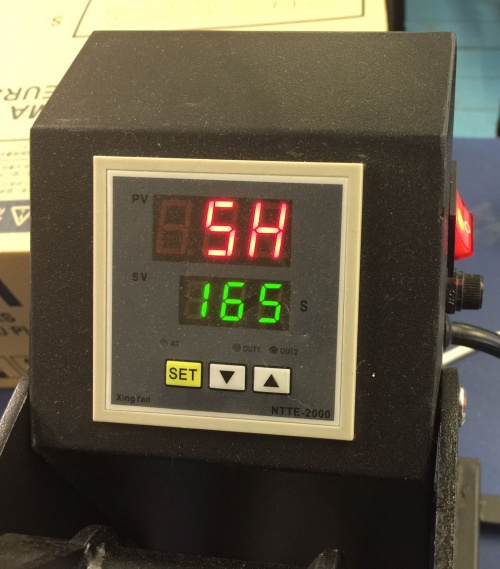
The top display will show 'SH'. Use the up and down buttons to set the target temperature.
Press the 'set' button again.
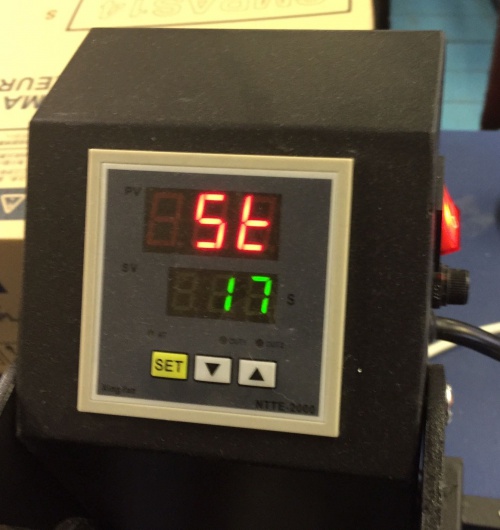
The top display will display 'St'. Use the up and down arrows to set the time you want to press for. Press 'set' button again when the correct time is displayed to return to normal mode with current temperature on top display and target temp on bottom display.
When the press has warmed up, put your t-shirt on the silicone mat. Pull down the handle. The timer will automatically start and will count down on the lower display. When the counter reaches zero the press will automatically release.
Adjusting Pressure
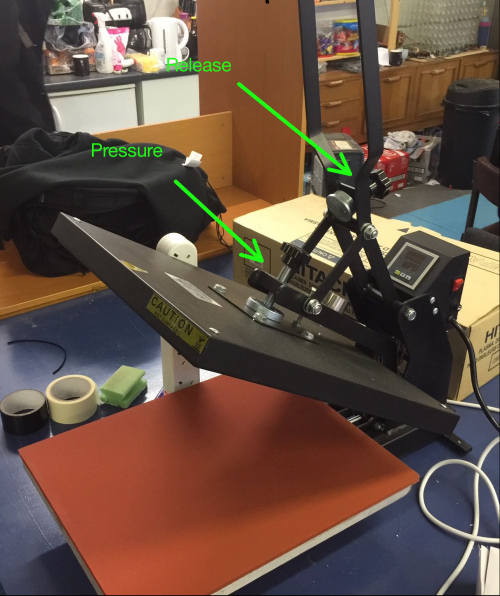
If you need to adjust the pressure, there are two knobs. The one nearest the front of the heating element (furthest from the control panel) adjusts the pressure. The other knob adjusts the release. If you adjust the pressure you may need to adjust the release knob. If the press will not latch adjust the knob out (anti-clockwise). If the press latches but does not release adjust the knob in (clockwise).
The heat press must be warmed up to adjust pressure - it is normal for it not to latch when cold


