Social Area: Difference between revisions
No edit summary |
No edit summary |
||
| Line 51: | Line 51: | ||
* PS3 works but we need controllers for it; suggest using the laptop HDMI cable connected directly to the TV to test it | * PS3 works but we need controllers for it; suggest using the laptop HDMI cable connected directly to the TV to test it | ||
* XBox boots up but the power ring alternates orange and red flashes; power cord disconnected because it won't power down from the front panel power button | * XBox boots up but the power ring alternates orange and red flashes; power cord disconnected because it won't power down from the front panel power button | ||
* Mega Drive needs a video/audio input of its own | * Mega Drive needs a composite video/stereo audio input of its own | ||
==== Connecting a laptop ==== | ==== Connecting a laptop ==== | ||
Revision as of 03:51, 23 February 2025

|
|
|
|
|
|
|
|
How to use the TV in the social area

The TV is setup to:
- Play console games
- Connect a laptop
Playing console games
Using the TV remote, use the "Source" button on the top right of the remote to choose "HDMI 1" as the input to the TV.
The TV will now take its input from the Kramer video switch mounted under the console shelf. The video switch must be turned on using the green switch on the left of the unit.

The Kramer video switch takes its inputs, in turn, from the available consoles. Press one of its input buttons to select a console:
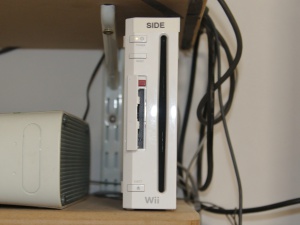
- Wii
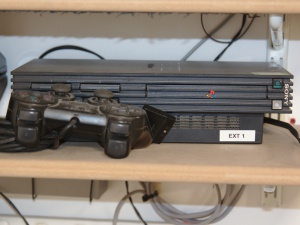
- PS2 - Play Station 2
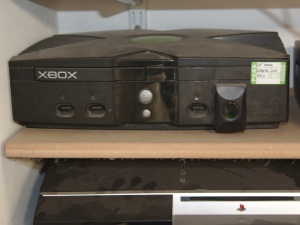
- XB - (original) XBox
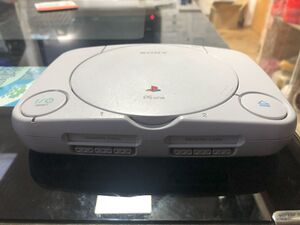
- PS1 - Play Station 1
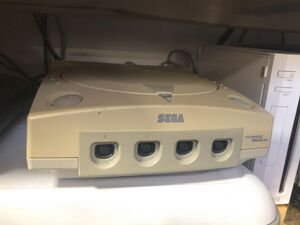
- DC - Dreamcast
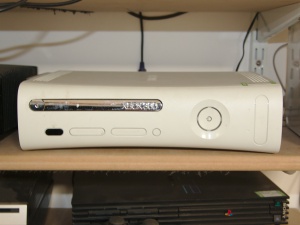
- 360 - XBox 360
A skull and cross bones marks the second HDMI input on the video switch as a dead input; attaching a known working HDMI cable and console to this input will give no picture.
Games are stored under the bench seat in a pull out foot rest.
Some of the consoles need further attention before they can be used:
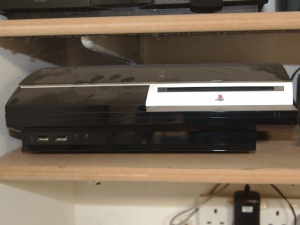
- PS3 works but we need controllers for it; suggest using the laptop HDMI cable connected directly to the TV to test it
- XBox boots up but the power ring alternates orange and red flashes; power cord disconnected because it won't power down from the front panel power button
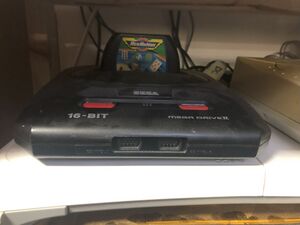
- Mega Drive needs a composite video/stereo audio input of its own
Connecting a laptop
Using the TV remote, use the "Source" button on the top right of the remote to choose "HDMI 2" as the input to the TV.
On the right hand side of the TV there is an HDMI cable resting on the shelf below it. It's already connected to the TV at one end. Take the free end of the HDMI cable and plug it into your laptop.
Depending on the make and model of your laptop you may need to go into your laptop's settings to treat the TV as a second screen that either mirrors everything you see on your laptop or as an additional display.
How to access the back of the TV
The mounting bracket pulls forward and then tilts upward to allow access to the power and ports on the back of the TV.
To pull the TV forward
Reach over the top of the TV on both sides and locate the metal tabs on the mounting bracket, seen here with a string through.
Lift these metal tabs up to release the locking mechanism that holds the TV in its normal position and pull the TV forwards, towards yourself.

To tilt the TV upwards
There are two pairs of pull cords, one to tilt upwards and lock the TV in this position while you work behind it, and another to release the TV and lock it in its vertical position.
These cords are seen here with metal ring and in one case a purple string.

Locate the correct pair of pull cords to tilt the TV upwards:

Use the other pair of pulls cords to return the TV to its vertical position before pushing it back towards the wall and locking it into place.