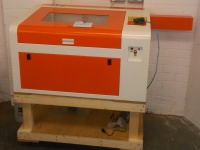
6040 Laser Cutter
About

In December 2014 we purchased a new A2 laser cutter from China and a LAOS controller board to upgrade it. The laser was delivered in January 2015 and work is currently underway integrating it into the hackspace RFID system so usage can be tracked. It's anticipated that things should be up and running ... when it is ready.
After the upgrade the laser is controlled with Visicut. The configuration for Visicut can be automatically installed (as of Mid Feb 2015) by simply selecting Leeds Hackspace from the list of laser cutters on first installation.
An induction on using the laser cutter is required before use by a designated Hackspace inductor.
Suggested Cutting Settings
These settings have been tried and tested, with some success. Experiment with them.
| Material | Thickness | Power | Speed |
|---|---|---|---|
| Acrylic | 3 mm | 100 | 12 |
| MDF | 3 mm | 100 | 12 |
Capabilities
The 6040 in the name is a reference to the size of the cutting bed - 600x400mm - given that the home position is not 0,0 we will loose some of that. It is a 60w Laser but it is a cheap chinese 60w laser, we have to not over-expect. The focal length from the centre of the lens to the centre of the cutting piece should be 50.8mm
There are limits to how thick it can cut, but the laser should cut:
- Acrylic sheet
- Plywood
- MDF
- Paper
- Card (with the exception of corrugated card)
You will NOT cut:
- Vinyl (toxic/corrosive fumes)
- Lexan (different toxic fumes)
- Corrugated card (fire risk)
- Food (it smells horrible and gunges up the laser)
You will NOT lick the laser cutter, even when inducted.
"Etch"-able with a mask on material (covered in induction):
- Metal
- Glass[1]
- Ceramics
All of the above need their reflectiveness dealing with or you could damage the laser.
Anything not mentioned above, ask a Laser-inducted director and do not be surprised/upset when they say "hell no!"
A useful guide as to whether they will say yes/no : http://www.originlaser.com.au/laser-materials/
Maintenance
- After use
- Allow laser to cool with water still running before powering off.
- Vacuum out any laser crud that's on/under the bed.
- Ensure you've left the laser clean and tidy.
- Remember your RFID card!
- Periodic
- Clean optics.
- Check coolant levels, top up with distilled water if necessary.
- Check vent tube for any escaped laser crud.
Installation Checklist
- Mount laser on trolley - DONE
- Drill wall for vent - DONE
- Install & fix vent tube - DONE
- Vent to laser flexi tube coupling - DONE
- Cut vent flange gasket - DONE
- Cut new control panel - v1 DONE
- RFID access - almost DONE
- Grand opening