Detailed Instructions On Use: Difference between revisions
Jump to navigation
Jump to search
No edit summary |
No edit summary |
||
| Line 14: | Line 14: | ||
File:Vinyl cutter pinch rollers.jpeg|Metal rollers, and movable pinch rollers to grip the vinyl and move it along the X axis | File:Vinyl cutter pinch rollers.jpeg|Metal rollers, and movable pinch rollers to grip the vinyl and move it along the X axis | ||
File:Vinyl cutter pinch rollers rear.jpeg|The pinch rollers from the rear of the machine, the levers are to release them to load vinyl | File:Vinyl cutter pinch rollers rear.jpeg|The pinch rollers from the rear of the machine, the levers are to release them to load vinyl | ||
File:Vinyl cutter rollers.jpeg|Rollers to hold the roll of vinyl, there are 2 spaces for the movable roller to accommodate different roll sizes | |||
</gallery> | </gallery> | ||
Revision as of 21:13, 8 July 2019
This page will show in detail how to use the vinyl cutter, from connecting it to a computer, checking the settings, loading vinyl, performing cuts, then weeding and making the finished layered vinyl graphics.
Overview of the vinyl cutter
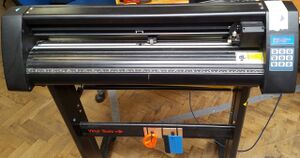
Here you can see the vinyl cutter, it lives in the craft area with it's cloth dust cover over it, the stand is on wheels, but just watch as you move it, the wheels don't move that well sometimes, and the cutter is not physically fixed to the stand (it's rubber feet sit on holes in the metalwork on the top of the stand, so you could dislodge it by rough handeling.
The main parts of the cutter are:
DELETE AFTER FINISH
File:Xxx
text


