Visicam: Difference between revisions
No edit summary |
mNo edit summary |
||
| (5 intermediate revisions by 2 users not shown) | |||
| Line 3: | Line 3: | ||
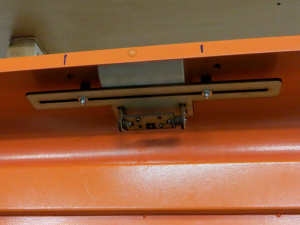
[[File:IMG_2807.jpg|thumb|alt=Visicam mount inside the laser cutter.|Visicam mount inside the lid of the ''[[Laser Cutter]]''.]] | [[File:IMG_2807.jpg|thumb|alt=Visicam mount inside the laser cutter.|Visicam mount inside the lid of the ''[[Laser Cutter]]''.]] | ||
[[File: | [[File:Markers.png|thumb|alt=Visicam detection markers.|Visicam detection markers.]] | ||
| Line 13: | Line 13: | ||
Visicam allows you to view a live image of your material laid in the laser cutter and [https://github.com/t-oster/VisiCam/wiki overlay the design] you want to cut/etch/etc onto the material directly. | Visicam allows you to view a live image of your material laid in the laser cutter and [https://github.com/t-oster/VisiCam/wiki overlay the design] you want to cut/etch/etc onto the material directly. | ||
The steps followed for setting up the Raspbian image used the latest Raspbian Jessie download as of 22nd of January 2016 along with the steps [https://github.com/t-oster/VisiCam/wiki/Raspberry-Pi-installation-on-Raspbian here] with the exception that OpenCV dev did not have to be compiled as the package was up to date in the repository. Also, javacv / javacpp did not have to be compiled as the pre-compiled binaries | The steps followed for setting up the Raspbian image used the latest Raspbian Jessie download as of 22nd of January 2016 along with the steps [https://github.com/t-oster/VisiCam/wiki/Raspberry-Pi-installation-on-Raspbian here] with the exception that OpenCV dev did not have to be compiled as the package was up to date (libopencv-dev2.4.9) in the repository. Also, javacv / javacpp did not have to be compiled as the pre-compiled binaries included with visicam worked. | ||
Visicam can be configured on: | Visicam can be configured on: | ||
| Line 23: | Line 23: | ||
The resolution was setup with the defaults specified in the visicam github wiki, though it should probably be scaled up to 1280x720, the resource allocation on the Pi 2 is already setup to allow this. | The resolution was setup with the defaults specified in the visicam github wiki, though it should probably be scaled up to 1280x720, the resource allocation on the Pi 2 is already setup to allow this. | ||
'''Todo:''' | '''Todo:''' Discussions currently happening in [https://groups.google.com/forum/#!topic/leeds-hack-space/wy_5KJ5bH18 this thread] | ||
'''VisicamRPiGPU''' | |||
Utilising the GPU on the RaspberryPi 2 is probably the best idea and this is possible with [https://github.com/FroChr123/visicamRPiGPU VisicamRPiGPU]. | Utilising the GPU on the RaspberryPi 2 is probably the best idea and this is possible with [https://github.com/FroChr123/visicamRPiGPU VisicamRPiGPU]. | ||
| Line 30: | Line 32: | ||
Unfortunately Visicam was not happy to use the rpigpu binary so use of this is still in testing. | Unfortunately Visicam was not happy to use the rpigpu binary so use of this is still in testing. | ||
'''Connections''' | |||
22/01/2016 At the time of writing a 1.6m-2.0m ribbon cable is required for the PiCam and the Pi needs connecting to the Hackspace network via ethernet. Wifi is an alternate consideration but probably a bad idea, partly due to being encased in a metal box (the cutter). | |||
Latest revision as of 14:14, 22 January 2016
Work in progress

The Laser Cutter operating on Visicut has been amended with a complementary Raspberry Pi 2 with a Class 10 8gB SDCard running Raspbian Jessie and VisiCam.
The Raspberry Pi should be accessible on the local network at visicam.hackspace once setup with the local DNS service on the server. Else you'll have to scan for it, provided it has been linked up via ethernet.
Visicam allows you to view a live image of your material laid in the laser cutter and overlay the design you want to cut/etch/etc onto the material directly.
The steps followed for setting up the Raspbian image used the latest Raspbian Jessie download as of 22nd of January 2016 along with the steps here with the exception that OpenCV dev did not have to be compiled as the package was up to date (libopencv-dev2.4.9) in the repository. Also, javacv / javacpp did not have to be compiled as the pre-compiled binaries included with visicam worked.
Visicam can be configured on: http://visicam.hackspace:8080/configPage.html
With the normal access page being: http://visicam.hackspace:8080
The resolution was setup with the defaults specified in the visicam github wiki, though it should probably be scaled up to 1280x720, the resource allocation on the Pi 2 is already setup to allow this.
Todo: Discussions currently happening in this thread
VisicamRPiGPU
Utilising the GPU on the RaspberryPi 2 is probably the best idea and this is possible with VisicamRPiGPU.
VisicamRPiGPU has to be compiled and at the time of writing a package dependency problem with python-argparse in Raspbian Jessie meant that the package had to be acquired from the Debian repository, installed manually, and omitted from the visicamrpigpu install script.
Unfortunately Visicam was not happy to use the rpigpu binary so use of this is still in testing.
Connections
22/01/2016 At the time of writing a 1.6m-2.0m ribbon cable is required for the PiCam and the Pi needs connecting to the Hackspace network via ethernet. Wifi is an alternate consideration but probably a bad idea, partly due to being encased in a metal box (the cutter).
